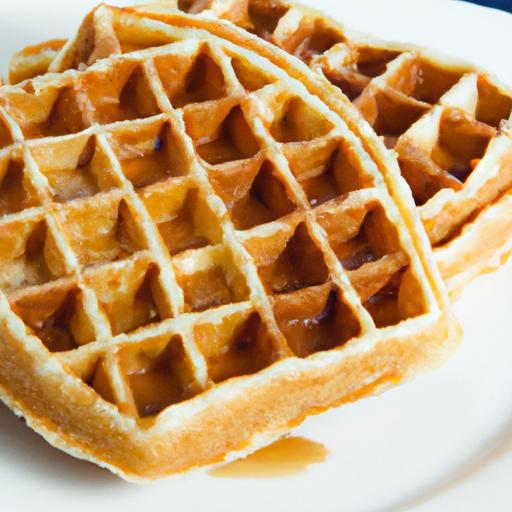


There’s something undeniably magical about the aroma of freshly made waffles wafting through the kitchen on a quiet morning. Fluffy buttermilk waffles, wiht their golden crisp edges and tender, melt-in-your-mouth centers, have long been a beloved breakfast staple – a true comfort food that elevates any start too the day. But what exactly makes these waffles so irresistibly light and flavorful? In this article, we’ll unravel the secrets behind crafting the perfect batch of fluffy buttermilk waffles, from ingredient choices to cooking techniques, ensuring your mornings are always greeted with a plateful of pure delight. Get ready to transform your breakfast routine and bring the joy of restaurant-worthy waffles right into your home.
Fluffy Buttermilk Waffles hold a special place in the pantheon of breakfast delights. Rooted in classic American kitchens yet universally adored, these waffles embody the perfect harmony of crispness and cloud-like softness. Achieving this balance is both an art and a science, hinging on thoughtful ingredient choices and delicate technique. Whether you’re an eager home cook or a seasoned brunch enthusiast, understanding these secrets will turn your morning routine into a celebration of texture and flavor.
Prep and Cook Time
- Planning: 10 minutes
- Cooking: 15 minutes
- Total Time: 25 minutes
Yield
Serves 4 (makes approximately 8 waffles)
Difficulty Level
Easy to Medium – perfect for cooks ready to elevate their waffle game!
Ingredients
- 2 cups all-purpose flour, sifted
- 2 tablespoons granulated sugar
- 1 teaspoon baking powder
- 1 teaspoon baking soda
- ½ teaspoon fine sea salt
- 2 large eggs, separated
- 2 cups buttermilk, well shaken
- ½ cup unsalted butter, melted and slightly cooled
- 1 teaspoon pure vanilla extract
Instructions
- Preheat your waffle iron according to the manufacturer’s instructions to ensure even cooking and perfect crispness.
- Combine dry ingredients: In a large mixing bowl, whisk together all-purpose flour, sugar, baking powder, baking soda, and salt. This even distribution activates the leavening agents for a lighter batter.
- Mix wet ingredients: In a separate bowl,whisk the egg yolks with buttermilk,melted butter,and vanilla extract until smooth. The acidity in buttermilk reacts with baking soda,creating tiny bubbles crucial for the airy texture.
- Combine wet and dry: Pour the wet ingredients into the dry mixture and gently fold with a spatula. Avoid overmixing; a few lumps are fine.Overworking develops gluten, resulting in dense waffles.
- Whip egg whites: In a clean, dry bowl, beat the egg whites to soft peaks using an electric mixer. This aerated foam is pivotal for lift and fluffiness.
- Fold whites carefully: Gently fold the whipped whites into the batter in batches, preserving the air bubbles. This step ensures waffles that are light and tender inside.
- Cook your waffles: Generously grease your waffle iron with butter or nonstick spray. Pour batter onto the hot iron, using about ½ cup per waffle. Cook until the edges are golden brown and crisp-usually 4-6 minutes depending on your machine.
- Keep warm: For best results, place cooked waffles on a wire rack in a warmed oven (around 200°F) to maintain texture before serving.
Tips for Success
- Ingredient Choice: Always use fresh baking powder and soda; their potency directly influences fluffiness.
- Temperature Matters: Use buttermilk at room temperature for optimal mixing and rise.
- Mix Gently: Resist stirring vigorously once wet and dry ingredients are combined. Light folding is your best friend for airy results.
- Egg Whites Magic: Whipping and folding in egg whites is non-negotiable for true fluffiness-skip it at your own risk!
- crispy Edges: Butter your waffle iron rather than using spray for a richer crisp texture.
- Make-Ahead: batter can be refrigerated overnight; gently re-fold the egg whites before cooking for fresh lift.
- Gluten-Free Alternative: Substitute flour with a 1:1 gluten-free blend but increase baking powder by ¼ teaspoon for rise.
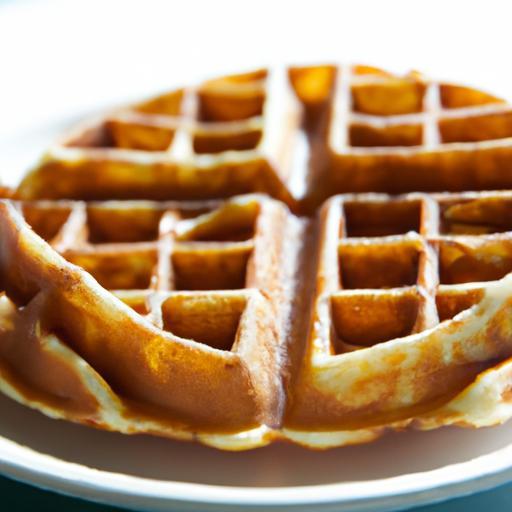
Serving Suggestions
These waffles truly shine topped with a pat of melting butter and a drizzle of warm maple syrup, but the possibilities are endless.For a festive touch, sprinkle with fresh seasonal berries, dollop with whipped cream, or add a dusting of powdered sugar. For savory lovers, try crispy bacon and a fried egg atop, allowing the contrast of textures to elevate every bite. Serving waffles stacked and staggered on a rustic wooden board showcases their golden edges beautifully, enticing your guests at first glance.

Nutritional Details
| Per Serving | Calories | Protein | Carbs | fat |
|---|---|---|---|---|
| 1 waffle (1/8 batch) | 220 kcal | 6g | 26g | 10g |
For a deeper dive into the chemistry of leavening and texture, check out Serious Eats’ detailed explanation. To explore more appetizing breakfast recipes, don’t miss our Easy Breakfast Ideas collection.
Q&A
Q&A: Fluffy Buttermilk Waffles – Secrets to Perfect Morning Treats
Q1: What makes buttermilk waffles different from regular waffles?
A1: Buttermilk waffles stand out because of their tangy flavor and ultra-fluffy texture. The acidity in buttermilk reacts with baking soda or baking powder, creating tiny bubbles that puff up the batter, resulting in waffles that are crisp on the outside and tender inside-a breakfast symphony that’s hard to beat!
Q2: How can I achieve that perfect fluffiness in my waffles?
A2: the fluffiness secret lies in a few key techniques: separate your eggs and beat the whites until stiff peaks form before gently folding them into the batter. This traps air and gives your waffles an airy lift. also,don’t overmix your batter-gentle folding keeps the bubbles intact.
Q3: Why is buttermilk essential? Can’t I just substitute regular milk?
A3: While you can substitute regular milk with a splash of vinegar or lemon juice to mimic buttermilk’s acidity, real buttermilk brings a depth of flavor and tenderizes the waffle’s crumb, enhancing texture and taste in a way plain milk can’t quite match. It’s the secret behind that irresistibly tangy, golden bite.
Q4: Should I preheat my waffle iron, and if so, how hot?
A4: Absolutely! A properly preheated waffle iron is crucial for crisp edges without overcooking the inside. Aim for medium-high heat, usually indicated by a ready light or temperature dial on your appliance. Test with a small dollop first-if it sizzles promptly and cooks evenly in 3-5 minutes, you’re golden.
Q5: Any tips for avoiding soggy waffles?
A5: To keep waffles crisp, transfer them to a wire rack placed over a baking sheet in a warm oven (around 200°F) after cooking. This prevents steam from softening the waffles.Avoid stacking them immediately or wrapping in foil, as trapped moisture turns them limp faster.
Q6: Can I prepare waffle batter ahead of time?
A6: Yes! You can mix the dry ingredients the night before and combine wet ingredients right before cooking.However, if you beat egg whites separately, it’s best to fold them in just before cooking to maintain fluffiness.Batter with baking soda or powder doesn’t keep well overnight, as the leavening loses its power.
Q7: What are some creative add-ins or toppings to elevate buttermilk waffles?
A7: The sky’s the limit! Try folding in blueberries, chocolate chips, or a touch of cinnamon for a flavor twist. Top your waffles with fresh fruit, whipped cream, maple syrup, or even a dollop of mascarpone and a drizzle of honey for pure bliss. Savory fans can go bold with fried chicken or avocado and a poached egg.
Q8: How does the choice of flour affect the waffle’s texture?
A8: All-purpose flour is the classic choice, providing a balanced structure. For lighter waffles, try substituting part of it with cake flour or adding a bit of cornstarch, which softens the batter. Whole wheat flour adds nuttiness but can make waffles denser, so it’s best mixed with all-purpose for a fluffy finish.
Q9: Is it necessary to use baking soda along with baking powder in buttermilk waffle batter?
A9: Ofen yes! Baking soda reacts specifically with the acid in buttermilk to help the batter rise quickly, creating those signature fluffy pockets.Baking powder adds additional lift for stability. Together, they work in harmony for that perfect texture.
Q10: What’s the best way to store leftover waffles?
A10: Cool leftover waffles completely and place them in an airtight container or zip-top bag. For short-term storage, keep them in the fridge for up to 2 days. For longer preservation, freeze them separated by parchment paper. Reheat in a toaster or oven to revive their crispness.
With these tips in your breakfast arsenal, you’re ready to create fluffy, flavorful buttermilk waffles that turn ordinary mornings into delicious celebrations!
The Conclusion
As you embark on your next breakfast adventure, remember that the secret to those irresistibly fluffy buttermilk waffles lies not just in the ingredients, but in the love and attention you pour into the batter. With the right balance of tangy buttermilk, gentle folding techniques, and a sizzling hot griddle, you’re well on your way to crafting morning treats that delight every time.So, whip up a batch, embrace the comforting aroma, and savor each golden, tender bite-the perfect start to any day is just a waffle away.