
There’s something irresistibly magical about a cheesecake-its velvety texture, rich flavor, and the way it melts effortlessly on your tongue. But let’s be honest: the conventional process of making a cheesecake can be time-consuming and a little intimidating.Enter the Instant Pot, the kitchen gadget that’s revolutionizing home cooking with speed and simplicity. In this article, we’ll uncover the secrets to creating a creamy Instant Pot cheesecake that’s as quick as it is flavorful. Whether you’re a seasoned baker or a curious beginner, get ready to delight your taste buds with a luscious dessert that comes together faster than you ever imagined.
Choosing the Perfect Ingredients for a Silky Smooth Instant Pot Cheesecake
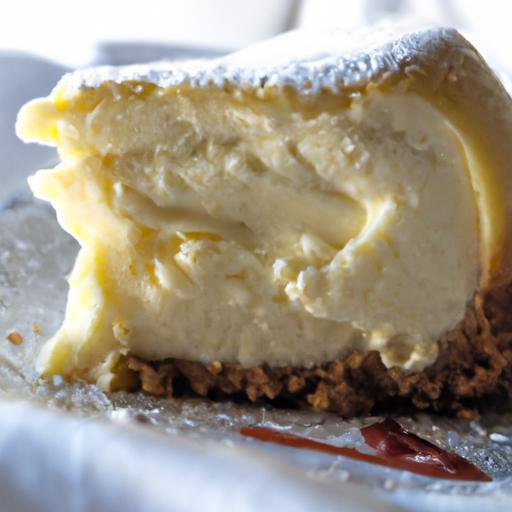
The secret to the creamy Instant Pot cheesecake lies primarily in selecting the right ingredients-each component weaving together to create a decadently smooth texture that melts on your tongue. Opt for full-fat cream cheese at room temperature for that luscious, rich base, and don’t settle for shortcuts like low-fat alternatives, which can alter the final consistency. Fresh, high-quality eggs form the backbone of this recipe; they help bind everything together while imparting a velvety mouthfeel.
For sweetness, pure vanilla extract and finely sifted powdered sugar add subtle brightness without overwhelming the delicate dairy flavors. A splash of sour cream or heavy cream brightens the richness and balances out the sweetness perfectly. And your crust-choose buttery graham crackers or finely crushed digestive biscuits, mixed with melted butter, to provide a crisp yet tender foundation that complements the creamy filling.
Step-by-Step Guide to Mastering the Creamy Texture with Your Instant Pot
Onc the ingredients are perfectly chosen, the method of readiness is just as critical. Begin by beating the softened cream cheese until it transforms into a smooth, silky paste without lumps. gradually incorporate your sugars and eggs, mixing gently to avoid incorporating extra air, which can cause cracks or a grainy texture. Pour the filling into your prepared crust-lined pan,and cover tightly with foil to prevent condensation from dripping onto your cheesecake.
Using your Instant pot’s “Manual” or ”Pressure Cook” setting at high pressure, time is everything. set it for 35 minutes, then let the pressure release naturally for at least 20 minutes to avoid sudden temperature changes that can compromise texture.This slow, gentle cooking process ensures a creamy, almost custard-like consistency that’s challenging to achieve with traditional ovens.
tips and Tricks for Baking Time and Pressure Settings to Achieve Flawless Results
- Preheat your Instant Pot: Run a quick warm-up cycle before placing the cheesecake inside to stabilize temperature.
- Use a water bath substitute: Place a trivet and a cup of water in the pot beneath your cheesecake to add moisture, preventing the filling from drying out.
- Natural Pressure Release: Resist the urge to quick-release; the natural release helps your cheesecake set gently and reduces cracking.
- Avoid overcooking: The cheesecake should still jiggle slightly in the center once done. It will firm up as it cools.
- Chill thoroughly: Refrigerate for at least 4 hours or overnight to develop the iconic dense creaminess and ease slicing.
Creative Variations and Serving Suggestions to Elevate Your Cheesecake Experience
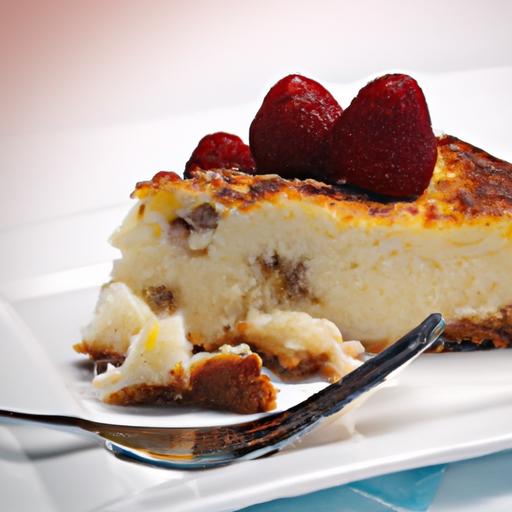
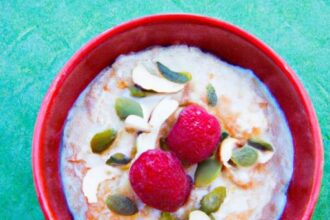
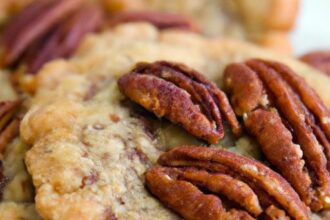
Transform your classic creamy Instant Pot cheesecake with endless creative twists. Incorporate swirls of fresh raspberry puree, melted chocolate, or caramel sauce into the batter before cooking for an artistic marbled finish. Fold in fresh berries or chopped nuts for added bursts of texture.
For a boozy touch, add a tablespoon of your favorite liqueur like Grand Marnier or Amaretto directly into the batter. Top your cheesecake with whipped cream,a dusting of cinnamon,zesty lemon curls,or toasted coconut flakes for a gourmet garnish. Serve slices alongside fresh fruit compotes or a drizzle of tangy fruit coulis to contrast the rich, creamy base and entice every palate.
Prep and Cook Time
- Preparation: 20 minutes
- Cooking (Instant Pot): 35 minutes
- Natural Pressure Release: 20 minutes
- Cooling & Chilling: 4 hours (preferably overnight)
Yield
Serves 8 generous slices
difficulty Level
Medium – perfect for adventurous home bakers ready to master instant Pot cheesecake finesse
Ingredients
- 24 oz (680g) full-fat cream cheese, softened to room temperature
- 3/4 cup (150g) granulated sugar
- 3 large eggs, at room temperature
- 1/2 cup (120g) sour cream or heavy cream
- 1 tsp pure vanilla extract
- 8 oz (225g) graham cracker crumbs or digestive biscuit crumbs
- 5 tbsp (70g) unsalted butter, melted
- 1/4 cup (30g) powdered sugar, sifted (optional, for topping)
Instructions
- Prepare the crust: Mix graham cracker crumbs with melted butter until well combined. Press the mixture firmly into the bottom of a 7-inch springform pan.
- Blend cream cheese: Using a hand or stand mixer, beat the softened cream cheese until smooth and creamy, about 2-3 minutes on medium speed. Avoid over-beating.
- Add sugar: Gradually add granulated sugar while mixing, ensuring it dissolves fully.
- Incorporate eggs: Add eggs one at a time, mixing on low speed just until combined. Do not overmix to prevent air bubbles.
- Mix in sour cream and vanilla: Fold in sour cream (or heavy cream) and vanilla extract until homogenous.
- Pour batter: Gently pour the filling over the prepared crust. Smooth the top with a spatula.
- Cover pan: Tightly seal the springform pan with foil to protect cheesecake from extra moisture.
- Prepare Instant Pot: Place the trivet inside,add 1 cup of water,then place the cheesecake on top using a sling or foil handles.
- Pressure cook: Seal the lid and set the Instant Pot to “Manual” high pressure for 35 minutes.
- Natural release: Allow pressure to release naturally for 20 minutes before carefully removing the lid.
- Cool and chill: Remove cheesecake, let cool to room temperature, then refrigerate for at least 4 hours or overnight before serving.
Chef’s Notes and Tips for Success
- Room temperature ingredients ensure smooth blending without lumps.
- Do not rush the natural pressure release or the texture may become grainy or cracked.
- Line your springform pan with parchment paper on the sides to prevent sticking.
- For a gluten-free option, use gluten-free graham crackers or almond meal for the crust.
- Leftovers keep beautifully in the refrigerator for up to 5 days or can be frozen for up to 1 month.
- To serve, run a knife around the pan edges before releasing the springform ring for clean slices.
Serving Suggestions
For a visually stunning presentation, finish each slice with a dollop of freshly whipped cream and a few shining berries such as raspberries or blueberries. dust a light sprinkle of powdered sugar over the surface for a delicate snowflake effect. Drizzling a tangy fruit coulis or rich caramel sauce gives contrast to the creamy texture and adds sweetness depth. Alternatively, serve alongside a scoop of homemade vanilla bean ice cream or a refreshing mint sprig for contrast. A hot espresso or a sweet Moscato wine pairs beautifully to complement the richness.
| Nutrient | Per Serving (1 slice) |
|---|---|
| Calories | 440 kcal |
| Protein | 8 g |
| Carbohydrates | 32 g |
| Fat | 32 g |
Explore more Instant Pot dessert recipes for your next delicious adventure,or learn advanced pressure cooking techniques from Serious eats’ comprehensive guide.

Q&A
Q&A: Creamy Instant Pot Cheesecake – quick & Delicious Recipe
Q1: What makes cheesecake cooked in an Instant Pot different from one baked in a traditional oven?
A1: Instant pot cheesecake comes out incredibly creamy and moist thanks to the gentle, even pressure cooking habitat. unlike conventional baking, the Instant Pot traps steam, preventing the cheesecake from drying out or cracking, resulting in a luscious texture that’s hard to resist.
Q2: How long does it actually take to make this Instant Pot cheesecake from start to finish?
A2: While traditional cheesecakes can take over an hour to bake plus cooling time, this Instant Pot version takes roughly 10 minutes to prep, about 35 minutes to cook, and additional time to chill.you’re looking at about 3 to 4 hours including cooling, but hands-on time is minimal, making it a quick and efficient delight!
Q3: Can I use store-bought graham cracker crust or should I make it from scratch?
A3: Both options work beautifully! Store-bought crust saves time and hassle, perfect for busy cooks. But if you want that extra homemade touch, mixing crushed graham crackers with melted butter and a hint of sugar creates a golden, buttery base that complements the creamy filling like a charm.
Q4: What’s the secret to achieving that ultra-smooth, creamy consistency in the filling?
A4: The magic lies in using full-fat cream cheese softened to room temperature, blending it well with sugar, eggs, and sour cream or heavy cream for richness.Avoid over-mixing once the eggs are added to prevent incorporating too much air, which keeps the texture silky rather than cakey.Q5: Is it necessary to use a water bath in the Instant Pot for this cheesecake?
A5: No water bath needed! The Instant Pot’s steam environment acts like a natural water bath, gently cooking the cheesecake and reducing the risk of cracks. Though,you do need to add water to the cooker base and use a springform pan sealed tightly with foil to prevent any water from seeping in.
Q6: How do I know when the cheesecake is perfectly cooked in the Instant pot?
A6: The edges should be set while the center remains slightly jiggly-think of a gentle wobble like chocolate pudding. The residual heat will finish cooking it during the cooling phase, and chilling it in the fridge will firm it up to that picture-perfect sliceability.
Q7: Can I customize the Instant Pot cheesecake with flavors or toppings?
A7: Absolutely! Mix in lemon zest, vanilla bean, or melted chocolate to the batter for a twist on the classic. After chilling, top with fresh berries, fruit compote, caramel drizzle, or whipped cream. The Instant Pot cheesecake is a dreamy canvas awaiting your creative touch.
Q8: What are common mistakes to avoid when making Instant Pot cheesecake?
A8: watch your water level to ensure the pot doesn’t burn dry, avoid overfilling the pan to prevent spills, and don’t rush the cooling process-letting it cool and chill fully is key to that iconic creamy texture. Lastly, resist the urge to open the pot right after cooking to prevent sudden temperature changes that can cause cracking.
With these tips and tricks, your creamy Instant Pot cheesecake will become the star of any gathering-quick to make, delightfully rich, and irresistibly smooth!
In retrospect
In the world of desserts, few treats offer the perfect balance of richness and ease like a creamy Instant Pot cheesecake. With this quick and delicious recipe in your culinary arsenal, you can effortlessly transform simple ingredients into a luscious masterpiece that’s ready to impress in no time.Whether you’re a novice baker or a dessert enthusiast pressed for time,the Instant Pot proves itself a game-changer-delivering velvety,dreamy cheesecake without the usual wait. So next time a sweet craving strikes, remember: indulgence is just a press of a button away. happy cooking, and even happier tasting!