

There’s a special kind of satisfaction in transforming simple ingredients into something delightfully creamy and wholesome-and few kitchen creations embody this magic quite like homemade yogurt. Beyond just a breakfast staple, yogurt is a canvas of culture, tradition, and nutrition, offering rich textures and tangy flavors that store-bought versions often can’t match. In this guide, we’ll demystify the art of crafting your own luscious, velvety yogurt right at home. With just a handful of ingredients, a little patience, and a splash of curiosity, you’ll unlock the secrets to creating creamy perfection that’s as rewarding to make as it is indeed delicious to enjoy. Let’s dive into the world where science meets simplicity,and turn your kitchen into a yogurt-making haven.
Crafting creamy yogurt begins with selecting the perfect milk that lays the foundation for that rich, velvety texture we all crave. Whether you’re drawn to the traditional warmth of whole cow’s milk or intrigued by luxurious alternatives like goat or sheep milk, your choice profoundly influences the end result. Whole milk with a fat content of around 3.5% offers the ideal balance, lending natural creaminess that transforms into silky yogurt after fermentation.
Prep and Cook Time
- Readiness: 15 minutes
- Fermentation: 6 to 12 hours (depending on desired tang and creaminess)
- Total Time: Approximately 6 – 12 hours 15 minutes
Yield
About 4 cups (1 liter) of rich, homemade yogurt
Difficulty Level
Easy to Medium – perfect for home cooks eager to master fermentation
Choosing the Perfect Milk for Rich and Velvety Yogurt
To elevate your homemade yogurt, start with the freshest whole milk. organic, grass-fed options enhance natural sweetness and depth. If you prefer a thicker texture without additional thickeners, opt for full-fat or even evaporated milk for creaminess. Avoid ultra-pasteurized milks as they can interfere with beneficial cultures. raw milk,when accessible and safe,yields supremely lush results thanks to its natural enzymes and fats.
Mastering the Art of Fermentation Timing for Optimal Creaminess
Timing is everything. The magic happens between 6 and 12 hours of fermentation at roughly 110°F (43°C). Shorter incubations produce milder, creamier yogurt, while longer fermentations build tang and thickness. Use a yogurt maker or maintain the pot in a warm, draft-free spot like an oven with the light on. Experiment to find what suits your taste best; remember, patience rewards you with a perfectly thick, velvety finish.
Incorporating Natural thickeners and Flavor Enhancers
For an extra indulgent texture, consider adding natural thickeners such as powdered milk, a spoonful of grass-fed gelatin, or agar-agar during the milk heating stage. These ingredients boost creaminess without overpowering the delicate yogurt flavor. To awaken the palate, swirl in a teaspoon of pure vanilla extract after fermentation or fold in fresh fruit purees for natural sweetness. A pinch of honey or maple syrup can further enhance the serving experience.
Storing and Serving Tips to Preserve Freshness and Texture
After fermentation, refrigerate your yogurt promptly to halt culturing and lock in freshness. Use airtight, glass containers to maintain texture and avoid off-flavors. Avoid stirring too much before serving to keep that lush, custard-like body intact. When plating, top with seasonal fruits, toasted nuts, or a drizzle of honey to highlight the creamy base.Remember, homemade yogurt tastes best within seven days of preparation for peak freshness and flavor.
Ingredients
- 1 quart (4 cups) whole milk (organic or grass-fed recommended)
- 2 tablespoons plain yogurt with live active cultures (starter)
- Optional: 2 tablespoons powdered milk for extra creaminess
- Optional: 1 teaspoon pure vanilla extract (added after fermentation)
- Optional natural thickeners: 1 teaspoon gelatin or agar-agar (dissolved in warm milk stage)
Instructions
- Heat the milk: Pour the whole milk into a heavy-bottomed saucepan.Heat gently over medium heat, stirring occasionally, until it reaches 180°F (82°C). This step kills unwanted bacteria and alters milk proteins to ensure thicker yogurt.
- Cool the milk: Remove from heat and let the milk cool to 110°F (43°C). Use a kitchen thermometer for accuracy to avoid killing the live cultures.
- Mix in starter yogurt: In a small bowl, whisk the 2 tablespoons of plain yogurt until smooth. Gradually add a cup of the warm milk, mixing to temper the yogurt.Combine this mixture back into the rest of the milk, stirring gently but thoroughly.
- Ferment: pour the milk mixture into a clean container and cover loosely with a lid or cloth. Place in a warm spot (like a yogurt maker, or oven with the light on) to incubate for 6 to 12 hours, depending on how thick and tangy you want your yogurt.
- Check and chill: When the yogurt firms up and passes the taste test, transfer it to the fridge for at least 4 hours to set fully and chill.
- Add flavors: After refrigeration, stir in optional vanilla or sweeteners if desired. Serve chilled with fresh toppings for a luscious treat.
Chef’s Notes: Tips for Success
- Use fresh, live yogurt starter for best fermentation results and consistent culture activity.
- Maintain steady fermentation temperature to prevent spoilage or thin yogurt.
- If your yogurt is too runny, try adding powdered milk next batch to boost thickness naturally.
- For Greek-style yogurt, strain your finished yogurt through a cheesecloth for 2-3 hours to remove whey and achieve that thick, creamy texture.
- Homemade yogurt can be stored up to a week; always keep lids tightly sealed.
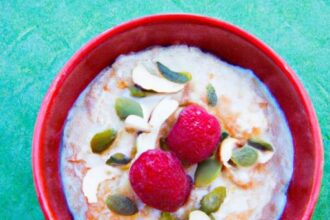
Serving Suggestions
Serve your freshly crafted creamy yogurt with a vibrant berry compote, a sprinkle of toasted almonds or granola for crunch, and a drizzle of local honey for natural sweetness. For savory dishes, spoon it over warm roasted vegetables or add a dollop to rich curries to bring out layers of flavor and provide cooling contrast. The versatility of homemade yogurt makes it a kitchen staple full of possibilities.
| Nutrient | Per 1 cup (245g) |
|---|---|
| Calories | 150 |
| Protein | 8 g |
| carbohydrates | 12 g |
| Fat | 8 g |

Ready to explore other fermented delights? Check out our extensive guide to making homemade kefir for a probiotic boost.
For understanding milk’s impact on fermentation, visit National Dairy Council.
Q&A
Q&A: Crafting Creamy Yogurt – A Simple Homemade Guide
Q1: Why make yogurt at home rather of buying it from the store?
A: Homemade yogurt offers a personal touch-it’s fresher, free from unnecessary additives, and customizable to your taste. Plus, it’s a fun kitchen adventure that connects you to ancient culinary traditions while saving money and reducing packaging waste.
Q2: What are the essential ingredients for making creamy yogurt?
A: At its core, homemade yogurt needs just two ingredients: milk and live yogurt cultures. The milk provides the creamy base, while the cultures-usually found in a small amount of store-bought yogurt or a starter-transform milk’s mild sweetness into tangy, luscious yogurt through fermentation.
Q3: Can I use any type of milk?
A: Absolutely! Whole milk yields the creamiest, richest results, but you can experiment with low-fat or even non-dairy milks like coconut or almond. Keep in mind, non-dairy versions may need extra thickeners or longer fermentation to mimic traditional creaminess.
Q4: How do I ensure my yogurt turns out thick and creamy every time?
A: Temperature and patience are your best friends. Warm the milk gently to around 110°F (43°C) before adding the starter-the cozy warmth encourages pleasant bacteria to multiply. Then,incubate for 6 to 12 hours without disturbance. For extra thickness,try straining the yogurt through cheesecloth to make Greek-style creamy goodness.
Q5: What kitchen tools will I need?
A: Keep it simple: a heavy saucepan, a thermometer, a whisk or spoon, a cozy container with a lid, and a warm spot or yogurt maker. No fancy gadgets necessary-just a sprinkle of care and patience.
Q6: How can I flavor and enjoy my homemade yogurt?
A: The world is your yogurt oyster! Stir in fresh fruit, honey, vanilla, nuts, or spices after fermentation. Use it in smoothies, salad dressings, baked goods, or simply savor it plain to enjoy the pure, creamy delight you created.
Q7: How long does homemade yogurt last?
A: Stored properly in the fridge, your creamy masterpiece can stay fresh for up to 2 weeks. Keep an eye (and nose) out for any off smells or mold as a sign to say goodbye.
Q8: What common mistakes should I avoid?
A: Avoid overheating the milk, as it can kill the live cultures. Also, don’t rush the fermentation-patience yields that perfect tang.Lastly, always use a fresh, quality starter yogurt with live cultures to jumpstart your batch.
Q9: Can I reuse homemade yogurt as a starter for the next batch?
A: Yes! Using your own yogurt as a starter creates a delightful ritual and evolves unique flavors over time. However, after several generations, the cultures may weaken, so refresh with store-bought live yogurt occasionally.Q10: Is making yogurt at home worth the effort?
A: Absolutely! It transforms a simple ingredient into a versatile, nourishing staple.Each batch is a creamy testament to your culinary creativity-and the satisfaction of making something wholesome with your own hands.
Insights and Conclusions
As you embark on your homemade yogurt journey, remember that the magic lies not just in the ingredients but in the care and patience you invest. Crafting creamy yogurt at home is more than a recipe-it’s a rewarding ritual that empowers you to savor freshness, customize flavors, and nurture your well-being. So grab your favorite jar, gather your starter culture, and let the simple science of fermentation turn humble milk into a silky delight. With each batch, you’re not just making yogurt-you’re creating a creamy canvas for delicious possibilities. Happy culturing!