


There’s something truly magical about cheesecake: its velvety texture, rich flavor, and indulgent creaminess make it an all-time favorite dessert.But let’s be honest-traditional cheesecake can be a bit of a labor of love, requiring long bake times and careful temperature control. Enter the Instant Pot, the game-changing kitchen gadget that transforms how we cook, and now, how we make cheesecake. In this article, we’ll dive into the world of creamy Instant Pot cheesecake-a speedy, easy, and utterly delicious treat that combines convenience with classic decadence. Whether you’re a seasoned baker or a curious newbie, get ready to discover how pressure cooking your cheesecake can elevate your dessert game to new, creamy heights!
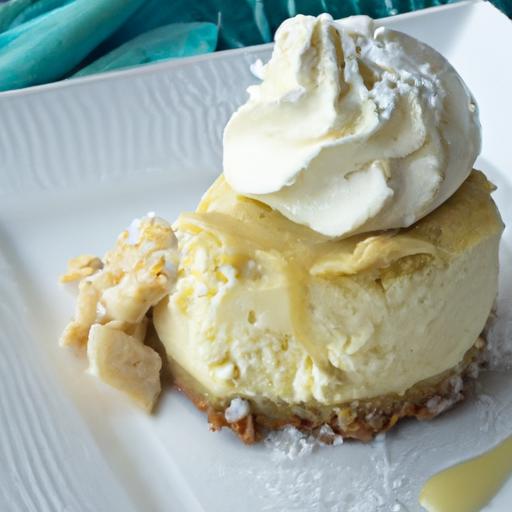
Creamy Instant Pot Cheesecake is a delightful shortcut to the classic rich dessert that has delighted palates for centuries. This method transforms a traditionally time-consuming bake into a quick,foolproof process that yields a perfectly smooth and velvety cheesecake every time.With its origin rooted in the luxurious textures celebrated in new York-style cheesecakes, this Instant Pot version preserves that decadent creaminess while cutting down wait times considerably. I still remember the first time I tasted a slice fresh from the Instant Pot-its glossy surface,the delicate crumbly crust,and melt-in-your-mouth filling instantly made it my go-to dessert for gatherings and cozy nights alike.
Prep and Cook time
- Preparation: 15 minutes
- Cooking (Pressure): 35 minutes
- Natural Release: 20 minutes
- Chilling: Minimum 4 hours (ideally overnight)
Yield
Serves 8-10 generous slices
Difficulty Level
Easy – perfect for beginners and busy home cooks
Ingredients
- 1 ½ cups graham cracker crumbs (finely crushed)
- 5 tbsp unsalted butter,melted
- 3 tbsp granulated sugar (for crust)
- 24 oz (680 g) cream cheese,softened to room temperature
- 1 cup granulated sugar
- 3 large eggs,at room temperature
- 1 cup sour cream,at room temperature
- 1 tbsp pure vanilla extract
- 1 tbsp all-purpose flour (optional,for extra stability)
- Pinch of salt
- 1 cup water (for the Instant Pot)
Instructions
- Prepare the crust: In a medium bowl,combine graham cracker crumbs,melted butter,and 3 tablespoons sugar. Mix until evenly moistened and sandy in texture.Press this mixture firmly into the bottom of a 7-inch springform pan to create an even crust layer.Set aside.
- Make the filling: Using an electric mixer, blend the softened cream cheese and 1 cup sugar until completely smooth and free of lumps. Beat in eggs one at a time, ensuring each is fully incorporated before adding the next. Stir in sour cream, vanilla extract, flour (if using), and salt until just combined – do not overmix to prevent cracks.
- Assemble: Pour the creamy filling over the prepared crust, smoothing the top with a spatula. Cover the pan tightly with two layers of aluminum foil to prevent water from leaking into the cheesecake during pressure cooking.
- Set up the Instant Pot: Pour 1 cup of water into the inner pot. Place the trivet inside and carefully lower the springform pan onto the trivet. Seal the lid and set the valve to “Sealing.”
- Pressure cook: Select the “Manual” or “Pressure Cook” mode and set the timer for 35 minutes on high pressure.Once complete, allow the pressure to release naturally for 20 minutes before carefully switching the valve to “Venting.” Remove the lid.
- Chill: Transfer the cheesecake to the refrigerator and let it chill for at least 4 hours or overnight. This step is crucial to achieve its signature silky texture and help the flavors meld.
- Remove and serve: Gently run a knife around the edge of the pan before unlatching the springform. Lift out carefully and transfer to a serving plate. Add garnishes or toppings as desired and slice with a warm, clean knife for smooth cuts.
Tips for Success
- Use room temperature ingredients to ensure a smooth batter with no lumps, which promotes the creamy texture critical to this cheesecake.
- Cover the pan tightly with foil to avoid water leakage and prevent the cheesecake surface from becoming grainy or wet.
- Allow natural pressure release to gently finish cooking so the cheesecake isn’t overcooked, which can cause cracks or a dry texture.
- Substitute graham cracker crumbs with homemade graham crackers for an extra special touch and fresher flavor profile.
- Experiment with cream cheese brands – some offer richer,tangier flavors that can elevate the dish subtly.
- Make-ahead friendly: Cheesecake can be prepared a day ahead, wrapped tightly, and stored chilled to deepen flavor and guarantee no last-minute stress.
- Add a drop of lemon juice for slight tartness to balance the richness if desired.
Creative Flavor Twists to Elevate Your Instant Pot Cheesecake
While a classic creamy cheesecake is divine on its own, spice things up with these inspired variations:
- Berry Swirl: Spoon dollops of fresh raspberry or blueberry puree onto the batter before cooking, then swirl gently with a knife for a marbled effect that adds vibrant color and fruity brightness.
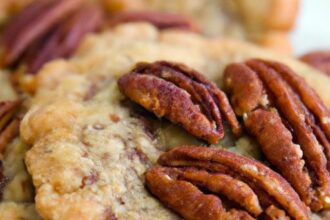
- Chocolate Hazelnut: Fold in ¼ cup of chocolate hazelnut spread into the cream cheese mixture to infuse each bite with rich, nutty decadence. Sprinkle chopped toasted hazelnuts on top before serving.
- Citrus Zest: Add 2 teaspoons of finely grated lemon or orange zest to the filling for a fragrant and zesty uplift that complements the smooth creaminess beautifully.
- Espresso Infused: Dissolve 1 tablespoon of instant espresso powder in a teaspoon of warm water and add it to the batter for a subtle coffee note that balances sweetness elegantly.
Serving Suggestions
Present your slice of cheesecake with a flourish-glaze it with a warm berry compote or drizzle with rich caramel sauce. Fresh fruits like sliced strawberries, blueberries, or pomegranate seeds add bursts of color and freshness. For an elegant touch, sprinkle chopped toasted almonds or a dusting of powdered sugar on top.Serve chilled on a crisp white plate to highlight the cheesecake’s glossy, creamy surface. Pair it with a cup of freshly brewed coffee or a glass of sparkling wine to complete the indulgent experience.
| Nutritional Value (per slice) | Amount |
|---|---|
| Calories | 370 kcal |
| Protein | 7 g |
| Carbohydrates | 28 g |
| Fat | 26 g |
Looking for more quick and indulgent dessert ideas? Check out our Easy Instant Pot Dessert Recipes to keep your sweet tooth satisfied with minimal effort.

Q&A
Q&A: Creamy Instant Pot Cheesecake - Quick, Easy & Delicious!
Q1: what makes an Instant Pot cheesecake different from a traditional oven-baked cheesecake?
A1: The Instant Pot cheesecake is a game-changer! Unlike the slow and sometimes tricky oven method, the Instant Pot steams your cheesecake, creating an ultra-creamy texture in a fraction of the time. Plus,you don’t need to fuss over water baths or cracks-this method delivers a silky,smooth dessert without the hassle.
Q2: How long does it actually take to make a cheesecake in the Instant Pot?
A2: From start to finish, you’re looking at about 45 to 60 minutes. That includes prep, pressure cooking, and a natural release. Compared to a traditional oven recipe that can take 1.5 to 2 hours plus cooling, it’s a speedy, scrumptious delight!
Q3: Can I customize the flavors easily with this recipe?
A3: Absolutely! The beauty of Instant Pot cheesecake is its versatility. Add swirls of chocolate, bursts of fresh berries, or zesty lemon for a personal twist.Since the base is so creamy and neutral, it serves as a perfect canvas for your flavor fantasies.
Q4: What crust options work best for the instant Pot cheesecake?
A4: Classic graham cracker crust reigns supreme-but feel free to get creative! Crushed cookies, nutty bases, or even a gluten-free alternative work brilliantly. Just press it firmly into the pan, and you’re set.
Q5: Do I need to grease the pan when making cheesecake in the Instant Pot?
A5: Yes, lightly greasing your springform or silicone pan prevents sticking and keeps your cheesecake gorgeous and intact when unmolding. It’s a simple step that pays off big in presentation.
Q6: How can I tell when the cheesecake is done?
A6: When the Instant Pot timer beeps, your cheesecake should be set but still slightly jiggly in the center-like a perfectly cooked custard. It will firm up as it cools, giving you that luscious, creamy texture every cheesecake lover craves.
Q7: Can I make this cheesecake dairy-free or vegan?
A7: With some ingredient swaps, yes! Use dairy-free cream cheese and substitute eggs with flax or chia “eggs” to maintain texture.While the Instant Pot method stays the same, expect slight differences in flavor and richness-the cheesecake adventure is just as exciting!
Q8: How should I store leftover cheesecake?
A8: Keep it refrigerated, tightly wrapped or in an airtight container, for up to 4-5 days. For freshness, serve chilled or bring to room temp before enjoying. It also freezes well-just thaw overnight in the fridge for an easy treat whenever cravings strike.
Q9: What if my cheesecake cracks-did I do something wrong?
A9: Don’t worry! While the instant Pot drastically reduces cracking compared to ovens,slight cracks can happen. Overmixing the batter or rapid temperature changes often cause this. The creaminess and flavor remain, so dig in with confidence!
Q10: Any tips for serving this cheesecake in style?
A10: Go bold or keep it classic-top with fresh fruit, a drizzle of caramel or chocolate sauce, whipped cream, or a sprinkle of toasted nuts. Serve on a pretty plate with a fork ready for swooning. Instant Pot cheesecake isn’t just a dessert; it’s an experience waiting to happen!
Future Outlook
there you have it-a luscious, creamy cheesecake that comes together effortlessly in your Instant Pot, transforming a classic dessert into a quick and easy indulgence. Whether you’re a seasoned baker or a kitchen newbie, this recipe proves that decadent treats don’t have to be complicated or time-consuming. So next time a cheesecake craving strikes, remember: with just a few simple ingredients and your trusty Instant Pot, dessert is always within delicious reach. Happy baking, and even happier tasting!