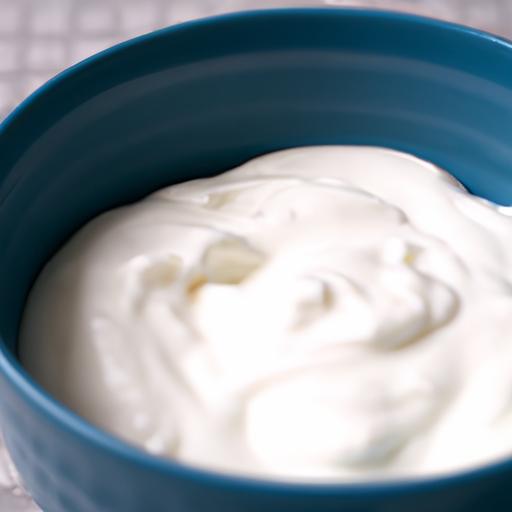


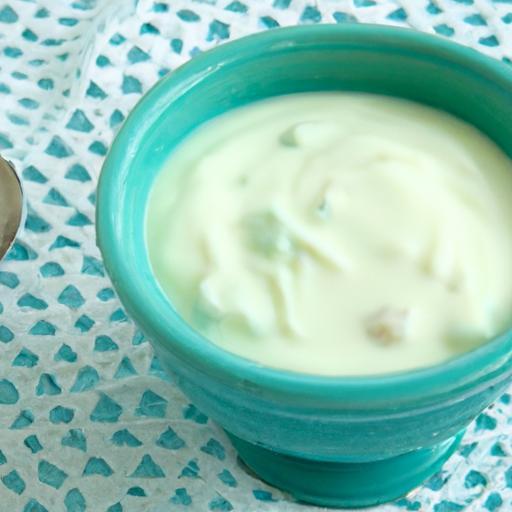
There’s something undeniably comforting about the smooth, velvety texture of freshly made yogurt-a creamy canvas ready to be transformed into a breakfast delight, a tangy snack, or a wholesome ingredient in your favourite recipes. But beyond the store-bought tubs lies a world of homemade possibilities, where you control every ingredient and savor the pure essence of cultured goodness. In this guide, we’ll unlock the secrets to crafting your own luscious yogurt at home, demystifying the process step-by-step so you can enjoy a healthful, flavorful treat straight from your kitchen. Get ready to stir up creamy perfection and embark on a delicious journey that’s as satisfying to make as it is to eat.
Unlock Creamy Goodness begins with selecting the right milk to ensure your homemade yogurt boasts that luscious, velvety texture we all crave. Whether you opt for whole milk’s richness or skim milk’s lightness,understanding milk’s fat content and freshness can transform your final product into a silky masterpiece. This guide pairs expert culinary knowledge with proven techniques, helping you master temperature and timing for ideal fermentation, explore inspiring flavor infusions, and troubleshoot to achieve consistent creaminess every time.
Prep and Cook Time
- Preparation: 15 minutes
- Fermentation: 6-12 hours (depending on desired tanginess)
- Total time: 6 hours 15 minutes - 12 hours 15 minutes
Yield
Approximately 4 cups (about 1 quart) of homemade yogurt
Difficulty Level
Easy to Medium – perfect for beginners eager to explore homemade cultured dairy
Ingredients
- 4 cups whole milk (or 2% milk for a lighter version, fresh and not ultra-pasteurized)
- 2 tablespoons plain yogurt with live active cultures (store-bought or leftover homemade as your starter)
- Optional flavor infusions: 1 teaspoon vanilla extract, 1 tablespoon honey, or a cinnamon stick
- Toppings for serving: Fresh berries, toasted nuts, a drizzle of maple syrup, or granola
Instructions
- Heat the Milk: Pour the milk into a heavy-bottomed saucepan. Warm it over medium heat until it reaches 180°F (82°C). This step helps to denature proteins, resulting in a creamier texture. Stir occasionally to prevent scorching.
- Cool the Milk: Remove the milk from heat and let it cool to about 110°F (43°C). Use a kitchen thermometer for accuracy. The temperature must be just right to activate the live cultures without killing them.
- Inoculate the Milk: In a small bowl,whisk the plain yogurt until smooth. Add 2 tablespoons of the cooled milk to the yogurt to temper it,then whisk this mixture back into the pot of cooled milk.
- ferment: Transfer the inoculated milk into a clean, covered container. Keep it warm at around 110°F using a yogurt maker,an oven with the light on,or a thermos. Maintain this temperature steadily for 6 to 12 hours-longer fermentation develops more tang and thickness.
- Chill and set: Once fermentation is complete, refrigerate your yogurt for at least 4 hours to fully set and mellow the flavors.
- Add Flavor and Serve: Before serving, gently fold in any optional flavor infusions like vanilla or honey. top with fresh fruit, nuts, or your favorite crunchy addition.
Tips for Success
- Choose fresh, high-quality milk, preferably not ultra-pasteurized, to nurture the cultures and promote creaminess.
- Consistency control: For thicker Greek-style yogurt, strain the finished yogurt through cheesecloth for 2-4 hours.
- Use a clean glass or ceramic container to avoid any unwanted bacteria; cleanliness is key for safe fermentation.
- If your yogurt turns out too tangy or runny, reduce fermentation time slightly or start with a milder starter culture.
- Experiment with flavor infusions by steeping spices or herbs in the milk during heating, then straining before inoculating.
- Save a bit of homemade yogurt as a starter for your next batch to develop a personalized culture.
Serving Suggestions
Present your homemade yogurt in rustic glass jars or bowls for a visually tempting treat. Swirl in a spoonful of natural fruit compote or a bright drizzle of organic honey to balance tartness. Sprinkle toasted almonds or walnuts on top for texture contrast, and garnish with mint leaves or edible flowers to impress your guests with elegant charm. Pair your creamy creation with a slice of warm, crusty bread or crisp granola for a wholesome breakfast or refreshing snack.

| Nutrient | Per 1 cup (245g) |
|---|---|
| Calories | 150 |
| Protein | 8g |
| Carbohydrates | 12g |
| fat | 8g |
For deeper insights into milk selection and fermentation science,explore this detailed study on dairy fermentation. To broaden your culinary repertoire, consider checking our guide to Greek-style homemade yogurt for a thicker and richer alternative.
Q&A
Q&A: Unlock creamy Goodness - Your Guide to Homemade Yogurt
Q1: Why should I make yogurt at home instead of buying it from the store?
A: Making yogurt at home isn’t just about saving money-it’s a journey into creamy,tangy goodness crafted by your own hands. Homemade yogurt offers complete control over ingredients (hello, no mystery additives!), allows customization of texture and flavor, and connects you to an age-old culinary tradition that’s both nourishing and satisfying.
Q2: What basic ingredients do I need to start making yogurt?
A: Just two simple ingredients: fresh milk and a good-quality starter culture.The starter can be a spoonful of store-bought plain yogurt with live active cultures or a freeze-dried yogurt starter. Milk varieties-whole, skim, or even plant-based-can be used, each lending its own character to your creamy creation.
Q3: How crucial is the incubation temperature?
A: temperature is the secret musician orchestrating your yogurt’s texture and tang. Ideally, the milk-and-culture mixture should rest at about 110°F (43°C) for 6-12 hours.Too cool, and the bacteria nap rather of work; too hot, and you risk killing the helpful microbes. Consistent warmth lets those friendly bacteria transform milk into luscious,probiotic-rich yogurt.
Q4: Can I make yogurt without special equipment?
A: Absolutely! While yogurt makers and instant pots simplify the process with precise temperature control, you can achieve great results using a warm oven, a thermos, or even wrapping your fermentation jar in towels. Creativity and patience are your best tools here.
Q5: How do I achieve that perfect creamy texture?
A: Creaminess depends on milk fat content, incubation time, and straining. Using whole milk delivers a richer mouthfeel, while longer fermentation deepens tanginess. for ultra-creamy Greek-style yogurt, strain your yogurt through cheesecloth or a clean kitchen towel to remove whey, yielding a thick, indulgent treat.
Q6: What flavors and mix-ins work best with homemade yogurt?
A: Your yogurt is a blank canvas! Stir in fresh fruits, fragrant honey, crunchy nuts, or a sprinkle of cinnamon. For adventurous palates, try adding vanilla bean, citrus zest, or even a dollop of homemade jam. The possibilities for luscious flavor combos are endless.
Q7: How long can I store homemade yogurt?
A: Typically, homemade yogurt stays fresh in the refrigerator for up to two weeks. Its tanginess may intensify over time,which can be delightful for some taste buds. Always check for off smells or mold before enjoying-but if properly stored, your creamy masterpiece will keep well.
Q8: Can kids get involved in making yogurt?
A: Definately! Yogurt-making is a fun, hands-on way to teach kids about fermentation, healthy eating, and patience. They’ll love seeing milk magically transform into a creamy delight-a super tasty science experiment in the kitchen.
Unlock the magic of making yogurt at home and savor every spoonful of that creamy goodness. Your taste buds-and gut-will thank you!
Concluding Remarks
Whether your craving a luscious breakfast boost or a tangy snack packed with probiotics, making your own yogurt opens the door to a world of creamy goodness tailored just for you. With simple ingredients and a touch of patience, you can transform everyday milk into a velvety delight that nourishes both body and soul. So go ahead-embrace the art of homemade yogurt and savor the satisfying simplicity of crafting this timeless treat in your very own kitchen.Your taste buds (and tummy) will thank you.